Furniture Restoration
We are leading specialists in 19th and 20th
Century furniture restoration and renovation, working with
Arts & Crafts furniture, Gothic Revival and Aesthetic
Movement designs.
The Arts & Crafts Home is fortunate to
be closely associated with the workshops of AD Restoration,
a team of highly skilled and experienced antique furniture
restorers, based in Brighton.
We can offer FREE
advice and FREE
valuations for the repair, renovation
and restoration of all your Arts & Crafts furniture.
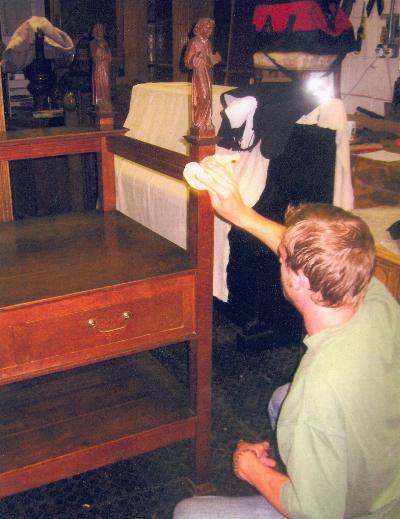
ANDREW DAWSON CLEANING A RARE VOYSEY BUFFET
We have recently been commissioned to repair
and renovate a unique group of furniture, designed by Sir
Robert Lorimer, and made by Whytock and Reid.

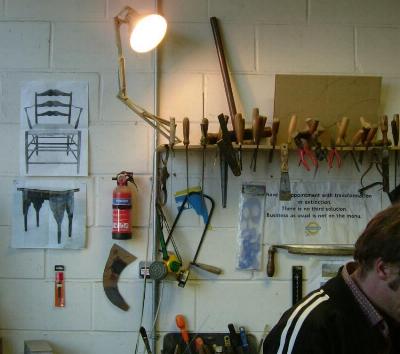
CHAIRS FOR REPAIR
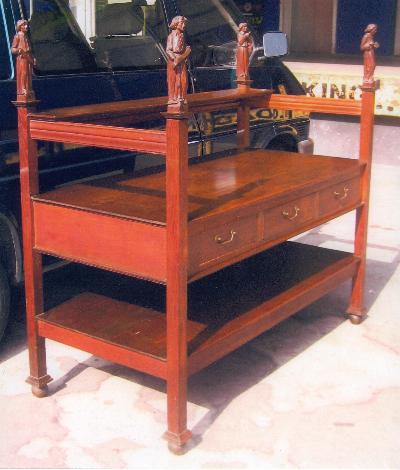
VOYSEY BUFFET RESTORED
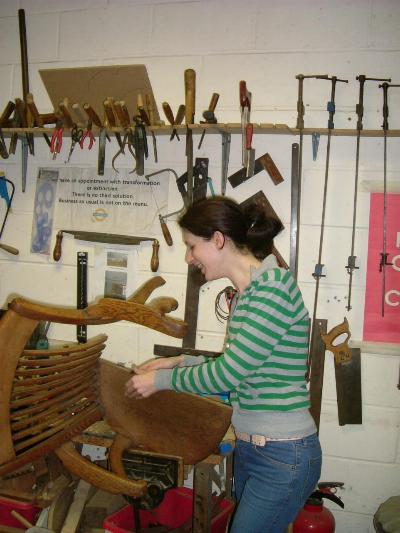
DAISY IN THE WORKSHOP

THE FINAL WORD... Nearly
CURRICULUM VITAE
ANDREW DAWSON
Dec 1995 - June 1996: Assistant conservator
at Windsor Castle following the fire. This job sparked my
interest in restoration and conservation.
Sept 1996 - June 1999: Batlons Furniture Restoration
& Craftsmanship at Buckingham University. This unique
degree course covered many aspects of this field, both academic
and practical. During this period I visited numerous auctions,
antique fairs and shows as well as a variety of historical
houses, museums and galleries. I also found work experience
over the two summer breaks with Dominic James Restoration
at Battersea.
Sept 1999 - Feb 2000: LASSCO at Old Street,
various duties
Feb 2000 - Feb 2001: Glen Fraser Sinclair
at Godstone, working on very high end English and Continental
furniture to London trade including Reindeer and Richard Fredericks.
Researching pieces for dealers, which included visits to The
British Library, The Public Records Office at Kew, The British
Museum, The V&A and correspondence with the Royal Archives
at Windsor.
Feb 2001 - Jan 2002: George Cooke Restoration
on Kings Road Chelsea. Restoration for high end London and
American trade also local private customers.
June 2003: Moved to Brighton and set up AD
Restoration
June 2005: University of Brighton, part time
Technical Demonstrator helping Degree students with wood based
design projects.
PHIL WAKE
1981 - 1986: Eton College, carpentry designing
& making
1987 - 1990: Kent University, BA Visual &
Performed Arts
1990 - 1992: Mallet Antiques of Bond Street,
tea boy/porter
1992 -1998: Managed and played in Bristol
band Burn/Sidewinder and also apprentice to an excellent restorer,
increasingly restoration took over from tunes!
2005: A.D. Restoration, restorer
DAISY COUPLAND
Education
2004 - 2005, Bada Dip, Conservation and Restoration
of Antique Furniture,
West Dean College
2000 - 2002, City and Guilds, Hand Crafted
Furniture, Northbrook College
1997 - 2000, BA (Hons) 2:1 Fine Art Painting.
The University Of Brighton
1995 - 1996, Foundation Studies In Art and
Design, Central Saint Martins
Employment
May 2006 - Present Furniture restorer A. D. Restoration
March 2002 - September 2004 and July 2005
- Present Graham Foster Antiques,
Hurstpierpoint
Feb 2001 - Jan 2002 Furniture restorer, general
assistant
John Hartnett and Sons, Brighton
Sir Robert Lorimer and his
Furniture
Sir Robert Stodart Lorimer (1864 - 1929) was a prolific Scottish
architect noted for his restoration work on historic houses
and castles, and for promotion of the Arts and Crafts style.
Lorimer was born in Edinburgh, the son of James Lorimer, who
was Regius Professor of Public Law at Edinburgh University
from 1862 to 1890. He was educated at Edinburgh Academy and
later at Edinburgh University. He was part of a gifted family,
being the younger brother of painter John Henry Lorimer, and
father to the sculptor Hew Lorimer. In 1878 the Lorimer family
acquired the lease of Kellie Castle in Fife and began its
restoration for use as a holiday home.
Lorimer began his architectural career working for Sir Robert
Rowand Anderson, and went on to form his own practice in 1893.
He was influenced by Scottish domestic architecture of the
16th and 17th centuries and the Scots Baronial style of Kellie
Castle where he had spent much time as a young man. Early
in his career, Lorimer became influenced by the ideas of William
Morris, and went on to become a committed exponent of the
Arts and Crafts style of architecture. He assembled a collaboration
of artists and craftsmen and, collectively, they exhibited
furniture at Arts and Crafts exhibitions in London. In 1896
he was elected to the Art Workers Guild.
Lorimer designed a series of cottages in the Arts and Crafts
style in the Colinton area of Edinburgh, the so-called "Colinton
Cottages". Constructed using traditional methods and
materials, each cottage included a garden layout and interior
design, including furniture, in keeping with the Arts and
Crafts concept. By 1900, eight cottages had been built and
four others were under construction. The decline in popularity
of the Arts and Crafts movement from 1900 saw the direction
of Lorimer's work change, and he undertook several large scale
country house commissions, mainly designed in the Scots Baronial
style. Ardkinglas, 1906, on Loch Fyne is a particularly notable
example of a Scots Baronial country house.
The outbreak of World War I restricted the demand for large
new houses and his attention shifted to restoration projects.
He already had a reputation as one of Scotland's leading restoration
architects following the restoration of Earlshall in 1899
and Hill of Tarvit in 1905, both in Fife. He went on to carry
out significant alteration and restoration works at Lennoxlove
House in East Lothian and Dunrobin Castle in Sutherland.
Although much of his work, and reputation, was in the sphere
of domestic architecture, Lorimer also carried out significant
public works. Principal amongst these include his design for
the new chapel for the Knights of the Thistle in St Giles
Cathedral, Edinburgh in 1911. He received a knighthood for
his efforts and went on to gain the commission for the Scottish
National War Memorial at Edinburgh Castle in 1919, subsequently
opened by the Prince of Wales in 1927.
After working with Sir Rowand Anderson in Edinburgh and G.F.
Bodley in London, Lorimer set up practice for himself in 1893
at 49 Queen Street, Edinburgh. The principal source of Lorimer's
inspiration was Scottish domestic architecture of the sixteenth
and seventeenth centuries.
The first work that brought Lorimer to public notice was the
new chapel for the Knights of the Thistle, St Giles Cathedral,
1911, for which he received a knighthood. There is no doubt
that the success of the Thistle Chapel prompted his selection
to design the Scottish National War Memorial at Edinburgh
Castle in 1919. After some alterations to the original plan
this building was opened by the Prince of Wales in 1927.
During his early career, Lorimer, influenced by the ideas
of William Morris, became an exponent of the Arts and Crafts
style of architecture. He gathered around him in Edinburgh
a talented group of artists and craftsmen and together contributed
furniture to the Arts and Crafts exhibitions in London. In
1896 he was elected to the Art Workers Guild.
Lorimer designed a series of cottages in the Arts and Crafts
style in the Colinton area of Edinburgh and also the Roman
Catholic Church of St Peter, Morningside. These 'Colinton
Cottages' were built using traditional construction methods
and materials. They came with a package of garden layout and
interior design, including furniture, all contributing to
the overall arts and crafts concept. Examples of these cottages
include 'Westfield', 40 Pentland Avenue and 'Binley Cottage',
42 Pentland Avenue. In 1900, eight cottages had been built
and four more were under construction.
However by 1901 the impetus for the Arts and Crafts cottage
movement was waning and Lorimer started to work on a series
of large scale country house commissions in a Scots Baronial
style: Brackenburgh, 1901-3; Rowallen, 1902, Ardkinglas, 1906
and Formakin, 1908. With the outbreak of World War 1, the
demand for large new houses declined and Lorimer's practice
concentrated on restoration projects. Lorimer had already
established a reputation as one of Scotland's leading restoration
architects following the restoration of Earlshall in 1899
and Hill of Tarvit in 1905, both in Fife.
Lorimer managed to impart an essence of Scottish spirit in
all he designed and was an ardent nationalist. His influence
spread well beyond the confines of Scotland.
His most eminent pupil Percy E. Nobbs called him 'the last
of the great Romantics' so while one may admire the Thistle
Chapel and the Scottish War Memorial it is perhaps his domestic
architecture and designs which have the most influence.
Lorimer became President of the professional body in Scotland,
the Incorporation of Architects in Scotland, and it was during
his tenure in office that the body received its second Royal
Charter, permitting use of the term 'Royal' in the title.
He died in Edinburgh in 1929.
SOME ANTIQUE FURNITURE RESTORATION
TIPS AND ADVICE
How to Repair Wooden Furniture Veneer
Because veneer is only a thin layer of wood
attached with glue to a solid base, it is very vulnerable
to damage on wooden furniture. On old furniture, the glue
that holds the veneer is often not water-resistant. Prolonged
humidity or exposure to water can soften the glue, letting
the veneer blister, crack, or peel. Veneer is also easily
damaged from the surface, and old veneers are often cracked,
buckled, or broken, with chips or entire pieces missing. In
this article, we'll discuss basic techniques to repair veneer
on your wooden furniture for any at-home furniture refinishing
or restoration project.
In most cases, as long as the veneer layer
is basically in good shape, the thinness that makes it damage-prone
also makes it easy to repair. Undamaged veneer can be reglued;
chips and bare spots can be filled with matching veneer. If
you're careful to match the grain the repairs will hardly
show. Let's get started with the repair techniques by reviewing
some common problems, blisters and cracks in veneer.
Blisters
Small blisters in veneer can usually be flattened
with heat.
To protect the surface, set a sheet of wax paper and then
a sheet of smooth cardboard on the surface, and cover the
cardboard with a clean cloth. Press the blistered area firmly
with a medium-hot iron. If there are several blisters, move
the iron slowly and evenly back and forth. Be careful not
to touch the exposed surface with the iron.
Check the surface every few minutes or so
as you work, and stop pressing as soon as the blisters have
flattened. Leaving the cardboard in place, weight the repair
area solidly for 24 hours. Then wax and polish the surface.
Large blisters must usually be slit, because
the veneer has swelled. With a sharp craft knife or single-edge
razor blade, carefully cut the blister open down the middle,
along the grain of the wood. Be careful not to cut into the
base wood. Then cover the surface and apply heat as above,
checking every few seconds as the glue softens; if the glue
has deteriorated and does not soften, carefully scrape it
out and insert a little carpenters' glue under the slit edges
of the bubble with the tip of the knife.
Be careful not to use too much glue. If necessary,
wipe off any excess as the blister flattens. As soon as one
edge of the slit bubble overlaps the other, carefully shave
off the overlapping edge with a craft knife or razor blade.
Heat the blister again; if the edges overlap further, shave
the overlapping edge again. When the blister is completely
flattened, weight the repair area solidly for 24 hours. Then
wax and polish the entire surface.
Loose Veneer
Lifted veneer occurs most often at the corners
of tabletops, on cabinet and dresser edges, legs, and drawer
fronts. If the loose veneer is undamaged, it can be reglued.
First, remove the residue of old glue left
on the back of the veneer and on the base wood. With a sharp
craft knife or razor blade, carefully scrape out as much of
the old glue as possible. Don't lift the veneer any further;
if you bend it up, you'll damage it.
After scraping out as much old glue as you
can, clean the bonding surfaces with benzene or naphtha to
remove any residue; glue left under the loose area will interfere
with the new adhesive. If any glue still remains, sand the
bonding surfaces lightly with fine-grit sandpaper, and then
wipe them clean with a soft cloth moistened with mineral spirits.
If more than one veneer layer is loose, clean each layer the
same way.
The veneer can be reattached with contact
cement, but you may prefer to use carpenters' glue because
it sets more slowly and allows repositioning. To reglue the
veneer, apply contact cement to both bonding surfaces and
let it set, as directed by the manufacturer. If necessary,
set a small tack or two between the layers to keep them from
touching. If you'd prefer to use carpenters' glue, use a small
brush to spread it along the grain. Then, starting at the
solidly attached veneer and working out toward the loose edge,
smooth the loose veneer carefully into place.
Contact cement bonds immediately, so make
sure the veneer is exactly matched; if you're using carpenters'
glue, press from the center out to force out any excess, and
wipe the excess off immediately. If more than one veneer layer
is loose, work from the bottom up to reglue each layer.
Reglued veneer, whatever adhesive is used,
should be clamped or weighted. To protect the surface, cover
it with a sheet of wax paper; make sure all excess glue is
removed. Set a buffer block of scrap wood over the newly glued
area, and use another block or a soft cloth to protect the
opposite edge or side of the surface. Clamp the glued and
protected surface firmly with C-clamps or hand screws, for
one to two days. Then remove the clamps and the buffers, and
wax and polish the entire surface.
How to assemble a custom wood picture frame
The same method is used to assemble a do it yourself custom
picture frame, whether you make a wood picture frame from
scratch or are repairing the loose corners on a frame or restoring
an older frame.
Each corner is a 90° angle split into two 45° angles,
that makes eight 45° angles to make fit perfectly, so
mitre, angle or picture frame clamps are almost a necessity.
I say almost, because if you're a glutton for punishment,
you can glue the corners without clamps, but it's very frustrating.
The clamps really aren't very expensive, they cost from a
few dollars to just a little over £30.00 for one of
the handiest mitre vices you could ever own and it will pay
for itself with the first few times you make a wood picture
frame with it compared to the price of custom picture frame.
Hiding Light Scratches
One of the best way's I have found is using a padding lacquer.
It really works well on household woodwork as well as furniture
when you get a light colored scratch in the finish. You will
need a soft cloth. Fold the corners until you can make a tight
ball out of the center. Apply the padding lacquer to the pad
and tap it into the palm of your hand. (Gloves come in handy
here). This will spread it through the pad. Lightly pad in
the direction of the grain like it is an airplane coming in
for a landing then taking off again. Don't over pad or come
to a stopped landing. Let it dry for a couple minutes and
reapply if needed until the scratch is melted back in. Usually
one swipe is all it takes. This will leave a high gloss finish
if you keep padding, so you may have to pad the whole surface
to make it all look the same.
Another way of removing light scratches is
rubbing the out with polishing compounds. These are best used
on high gloss sheens. If your table has a satin or dull sheen,
grab a pad of OOOO Steel wool and some lemon oil or wool lube.
Put some on the pad and rub the spot moving in the direction
of the grain. This only works on minor scratches, and you
may need to rub the rest of the surface so the sheen is even.
Make sure you go with the grain in long even strokes from
one end to the other. To finish the task, simply wipe off
the remaining oil and apply your favorite polish. If you need
to add color to the scratch, Touch up markers and fill sticks
come in real handy.
I can recommend Cornwall Furniture Restoration
a fine Antique Furniture Restorers and French Polishers, who
can be found at CORNWALL
FURNITURE RESTORATION
|